|
|
You are here: Foswiki>Main Web>Computing>Mail>MailFilters>Sieve (06 Aug 2023, WilliamSeligman)Edit Attach
Using ManageSieve on the Nevis mail server
On the Nevis mail server, the Sieve protocol is handled by Pigeonhole ManageSieve Server of the Dovecot IMAP server.Using webmail
The simplest way to access and edit your Sieve configuration is:- Login via Nevis webmail.
- Click on the "Settings" icon near the upper right-hand corner of the page.
- Leave the "Filter Sets" panel alone. Unless you want to switch between different sets of filters, the default
managesieveset will do.
- Click on "Filters" in the left-most panel, "Settings".
- Click on the big plus ("+") sign on the bottom of the middle "Filters" panel to create your first filter.
A practical example
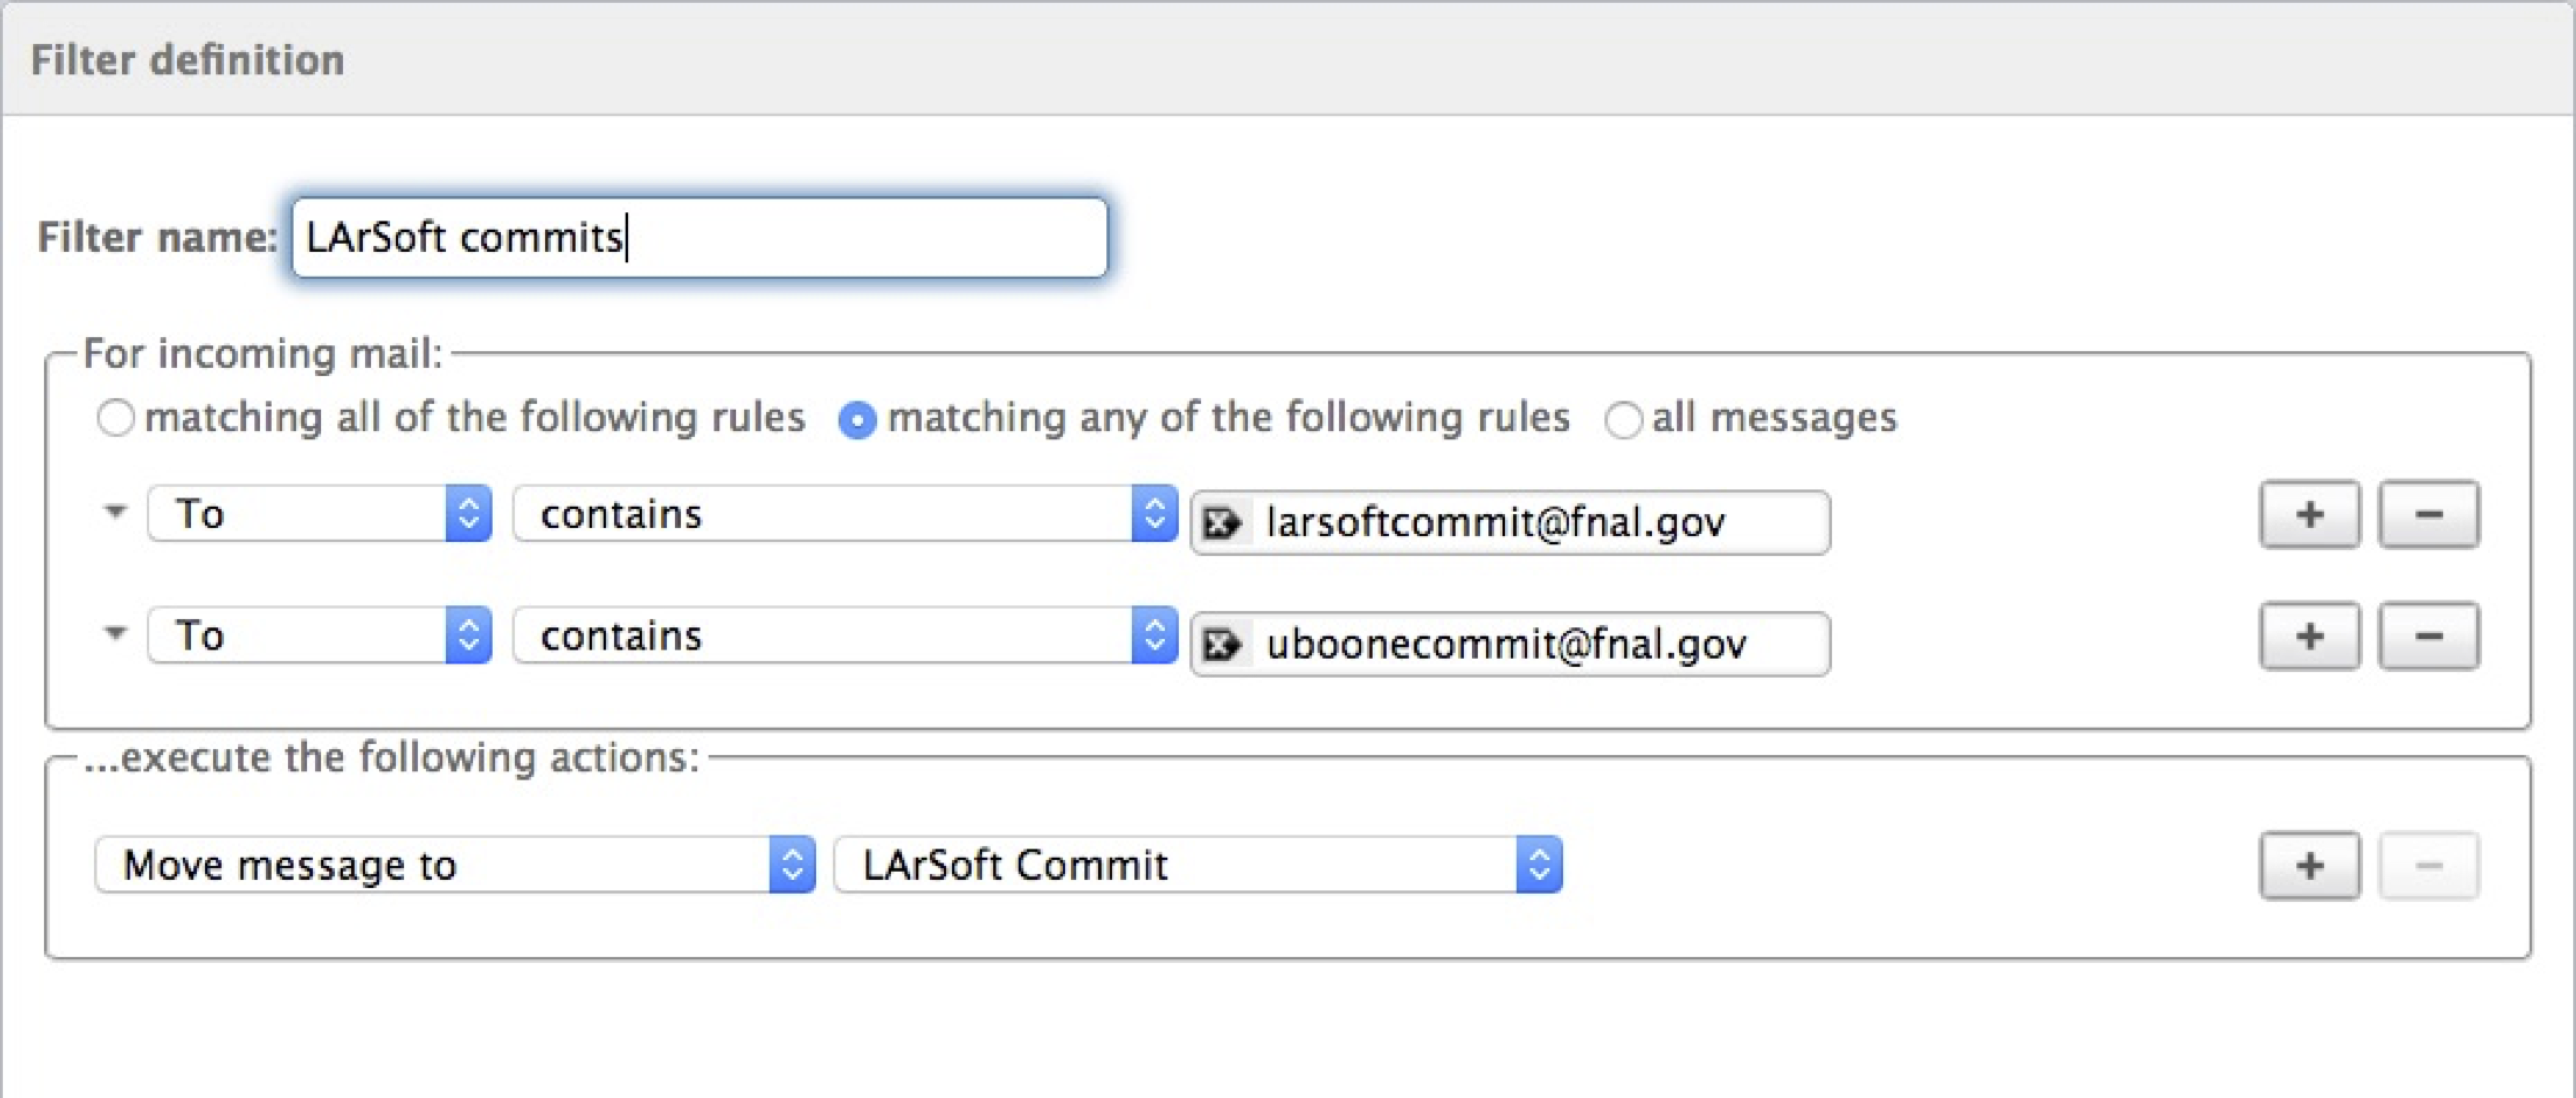
Reminder from the Mail Filters page: Every time a LArSoft developer makes a change to the LArSoft git repository, I get an email message fromlarsoftcommit@fnal.gov or uboonecommit@fnal.gov. Frequently I get dozens of such emails every day. I don't want to automatically delete them, since there may be something that impacts my work, but I don't want them cluttering my INBOX either.
So I use a mail filter to test if the "From" address of each email I receive includes larsoftcommit@fnal.gov or uboonecommit@fnal.gov. If it does, the mail is immediately sent to my LArSoft commit folder instead of my INBOX. Periodically I review the contents of that folder to see if any code changes are relevant to me.
When I implemented this filter using Sieve in webmail, this is what I see:
Using Thunderbird
If you prefer, you may be able to edit Sieve filters directly from within Thunderbird. To do this, you have to download a plugin. Note: As of Nov-2020, the Sieve plugin works with Thunderbird as long as you have the most recent versions of both. To install the Sieve plugin into Thunderbird (you will only have to do this once):- In Tools menu, select "Add-ons".
- In the left-hand pane, click on "Get Add-ons".
- On the right-hand side, click on "Browse all add-ons".
- In the search bar on the upper right area of the page, enter "Sieve".
- Click on the "+ Add to Thunderbird" button next to the Sieve plugin.
- On the permissions dialog box, click on "Install Now".
- In Thunderbird's "Tools" menu, select "Sieve Message Filters".
- In the panel that's displayed, under your Nevis mail account click "Connect".
- Under "Tools" select "Sieve Message Filters"
- Click on "managesieve" if it's not already selected, then click on the "Edit..." button on the right-side of the panel.
- You can edit the raw Sieve source if you wish, but you probably want to use the GUI editor to make sure your syntax is correct. If the "Source" button near the top left of the panel is highlighted, click on it to turn it off.
Edit | Attach | Print version | History: r5 < r4 < r3 < r2 | Backlinks | View wiki text | Edit wiki text | More topic actions
Topic revision: r4 - 06 Aug 2023, WilliamSeligman
Ideas, requests, problems regarding Foswiki? Send feedback